|
|
|
|
Download these instructions as an Adobe (PDF) file by clicking here. To save onto your computer Right click the link and 'Save Target As'.
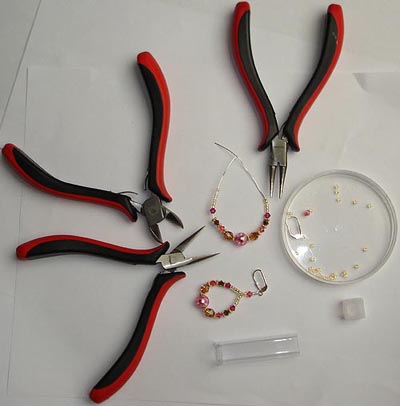 |
Gathering your materials together -
pictured are the suggested round nosed and flat pliers and cutters you
may wish to use.
|
|
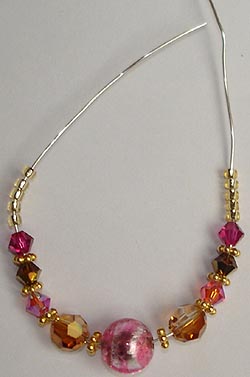 |
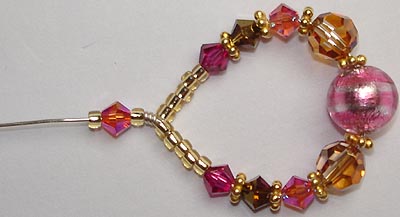
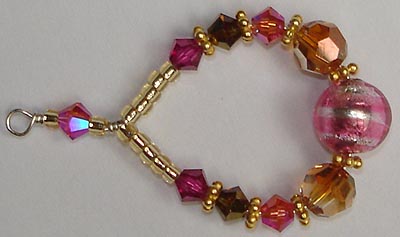
Having cut the length of sterling wire
in half, then thread your beads on as shown; pay attention to ensuring
the bead pattern is as shown.
|
|
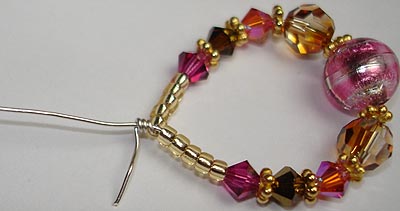 |
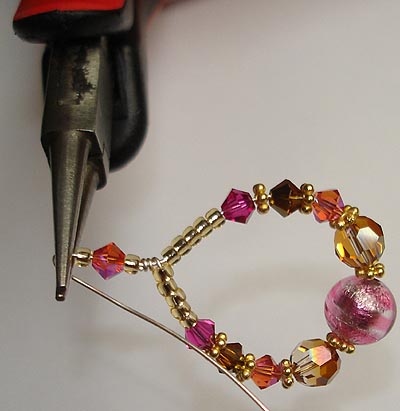
Bring the entire group of beads towards
one end of the wire, and make a loop by coiling the short end of the
wire round the long, making about three wraps, as shown. You now have
your bead loop, with a wrap of wire, and then a long tail of wire above
this.
|
|
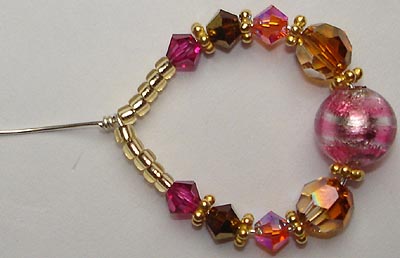 |
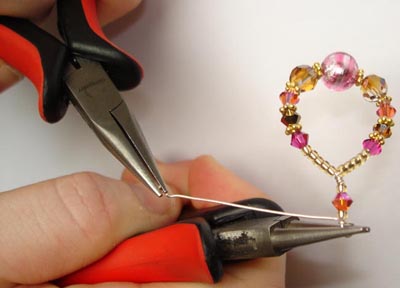
Once you are happy with the wrap, cut
it at the short end, then neaten the 'sharp' edge of the cut with your
flat pliers. You may now need to gently manipulate the beads to form
a neat-looking loop/circle.
|
|
 |
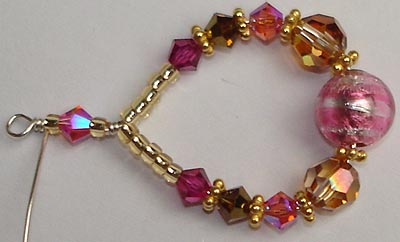
Above the loop of beads and your wire
wrap, thread as follows: One gold-lined Rocaille; One Padparadscha ABx2
bead; One gold-lined Rocaille.
|
|
 |
Make a 'hangman's loop' (if needed,
more instructions on this in the Hints and Tips section on the site)
above these beads; once you are absolutely sure both earrings are the
same, that everything is in the right order and it all looks neat and
right, consider whether you are happy to cut the remaining spare wire
and tidy the end up with your flat pliers.
|
|
 |
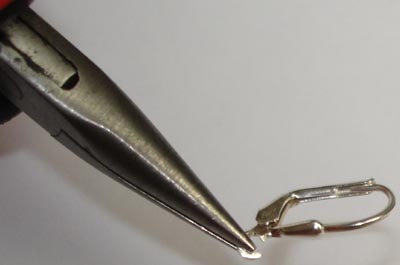
Making the 'hangman's loop' with two
pairs of pliers - round nosed and flat ones.
|
|
 |
The coil of silver should be around
3 wraps. If required, neaten and/or straighten the hanging loop above
with your round nosed pliers.
|
|
 |
As before, cut close to the beads and
neaten the end of the wire with your flat nosed pliers.
|
|
 |
Open the loop on the earring fittings
with a crosswise motion, thread on the earrings and close the earring
fittings loop neatly using the same crosswise motion.
|
|
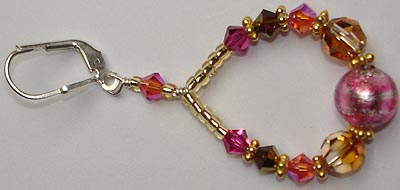 |
A finished earring....
|
|
© Copyright BeadAddict 2000 - Present