Get the kit for only: £12.50
Tools are not included. You need round nose, flat nose and standard
wire cutter pliers, memory wire cutters and neaten/ finish with your
round nose or chain nose pliers (this takes strength and the ends
of memory wire is sharp, so please do not allow children to do this).
This bracelet will fit just about any wrist size and does not need
a clasp to finish it as the memory wire 'snaps' it into place.
Start by checking your memory wire and ensuring they are around the
same length, and make a coil at one end of the memory wire on each
piece.
Make the leaf links with simple wire wrapped loops top and bottom
(see our hints and tips here
for how to make wrapped loops); when threading your leaf beads, you
will alternate 'top to tail' which helps the bracelet fit together.
You have more than enough wire to make your leaf links and loops (and
should have some left over to practice with if necessary).
You could choose make a shorter bracelet (for instance, for a child)
by using less links and spacer beads. It is VERY IMPORTANT
that you do not cut memory wire with ordinary cutting pliers as this
will ruin them - its important to use memory wire cutters, for instance
to trim to size or to neaten your loops.
It would be quite easy to make this bracelet in a different colourway
by subsituting the leaves and beads - for instance using crystal/ab
czech glass leaves and using a cream/white crystal pearl - as long
as your spacer beads are around 6mm, anything in this size should
work.
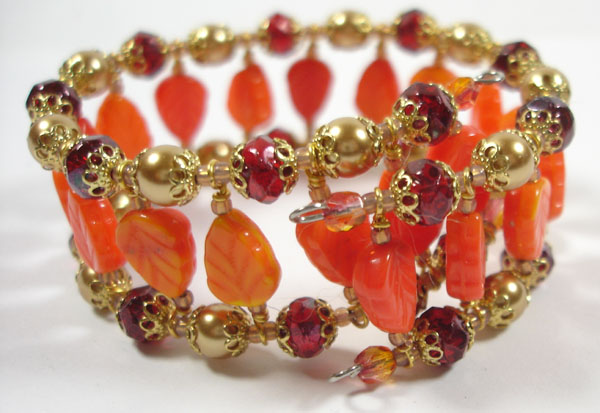
In the example above, we show the bracelet starting with a couple
of 4mm Czech glass faceted rounds, but your kit will start with Swarovski
crystal pearls - you will have more pearls in the kit than the red
Czech glass beads, so start your threading off with the pearls.
Place a seed bead/rocaille at the top
and tail of each leaf bead, and then one before and after the round
beads (both Swarovski and Czech glass) - follow the photo for more
information.
We advise you string one side to completion before starting the lower
side. Getting the second strand of memory wire through is initially
a bit fiddly but you soon fall into a rhythm; after making your last
loop on your lower strand, go back to your end/memory wire loops all
over the bracelet and just tighten/neaten them up until you are happy
with their appearance.
 Basket &